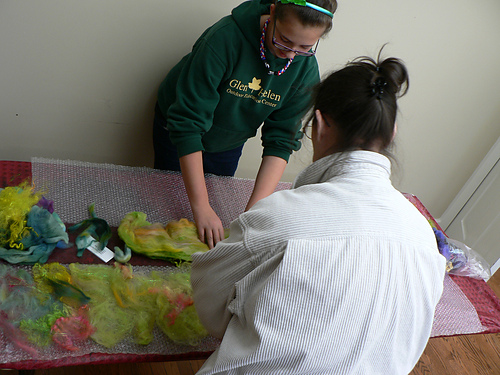
This week in after school art, visiting artist Pamela Howard taught my middle schoolers how to make felted scarves. It was a great project and I think they rather enjoyed it. Pamela had found an adapted tutorial on how to make these with kids using a base of inexpensive sewer's cheesecloth instead of silk (we don't have those kinds of funds!) and easily available tools such as 2" diameter PVC pipe, bubble wrap, olive oil soap, and rubber bands. One of Pamela's friends from an online fiber community she's a part of donated all of the wool we needed for the project, which she had hand-dyed into a beautiful rainbow of colors. Read on for more on this project after the jump!

First the students learned about felt and the different animals it can come from, and then how felt is washed, spun, and dyed. Then they each got to start their scarf by laying out thin pieces of the wool on their bubble wrap. They laid their cheesecloth over their first strip of wool (the wool and bubble wrap had previously been cut to the same dimensions to help them measure) and repeated the process on the other side. Then it came time to spray the wool with warm diluted olive oil soap which we had handy in some squirt bottles. After that they tightly rolled up their bubble wrap, felt, and cheesecloth sandwich around the PVC pipe. We rubber banded them in place on each end and then vigorously rolled them until they began to felt. We had to unroll and tighten each one several times, because felting means shrinking! If you try this, be sure to alternate rolling the scarce back up from the alternate end each time. The girls went over by about ten minutes and just got their scarves rinsed out in cool water in time for parent pick up. In the made dash I forgot to photograph their lovely creations, but at least you get to see the process. Enjoy! -hil


No comments:
Post a Comment